
How to Install a Shade Sail: A Step-by-Step Guide
Most shade sail problems are not fabric problems. A sail that sags, flaps or pulls a screw out of a post was usually measured loosely, hung on the wrong anchor, or never tensioned in the right order. The fabric did its job; the installation did not. This guide shows the whole job in nine steps, with a drawing for each one, so you can picture the finished corner before you drill anything.
It is written for a typical backyard sail on a patio, deck or pool area. If your site gets strong wind, heavy snow or severe storms, also read Shade Sails in High Winds: What Actually Helps, and have a qualified installer look at large or permanent structures.
Step 1: Decide where the shade should fall
Go outside at the time of day you actually want shade, not at noon. A dining table that is shaded at 12:00 may be in full sun at 4:00, and a west-facing door needs coverage late in the afternoon. Note the doors, gates, grill, pool steps, utility lines and any tree that will grow into the space.
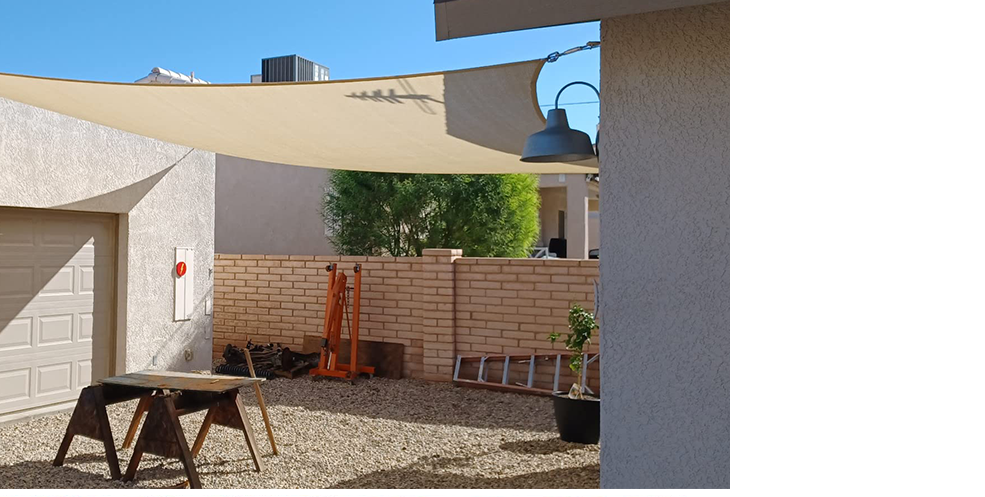
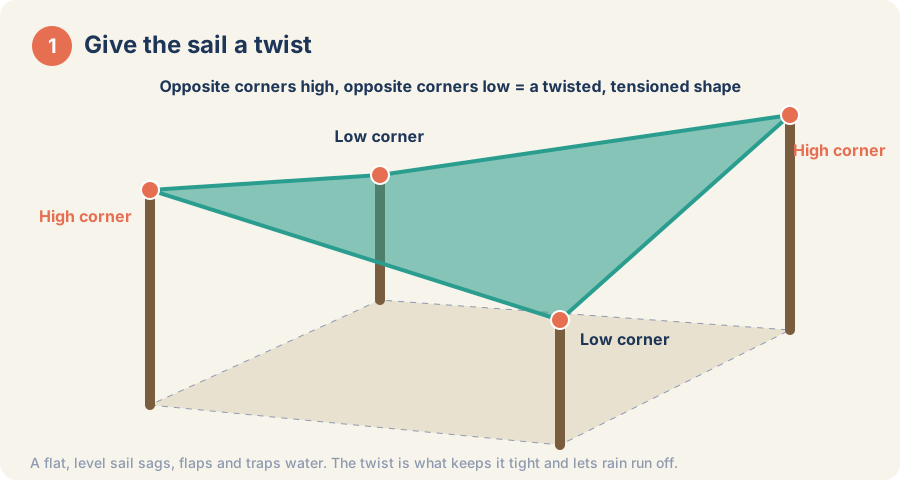
A shade sail is not a flat tarp. It needs a three-dimensional shape: at least one corner set higher or lower than the rest. That twist pulls the fabric tight and gives rain a way to leave. The drawing above shows the usual layout for four corners, with one diagonal pair high and the other pair low.
Triangles suit small or awkward spaces and need only three anchors. Squares and rectangles cover more ground but need four well-placed anchors. If you are choosing a type, look at our permeable (breathable) sails, which let air and light rain through, the waterproof sails, which shed rain and need a steeper pitch, and the cable shade sails with steel cable built into the edges. Most are available in custom sizes.
Step 2: Measure anchor to anchor
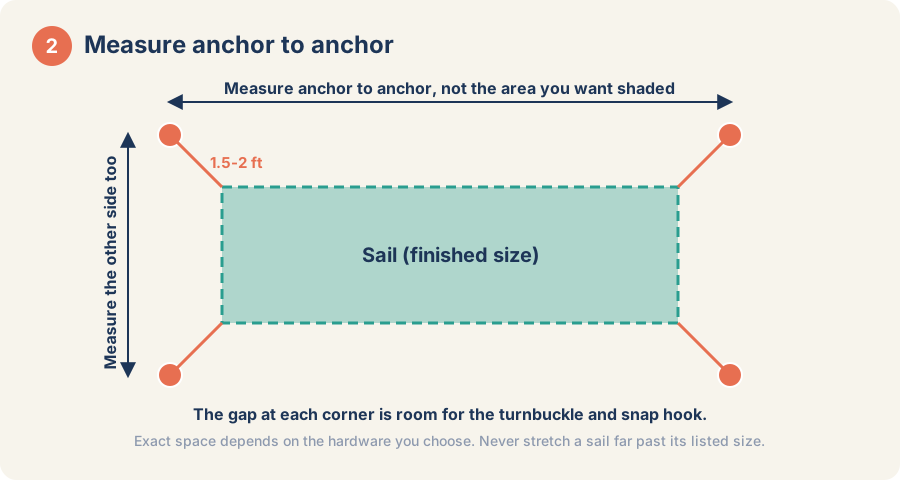
Measure the distance between the real attachment points, not the patch of ground you want to cover. The sail has to be smaller than that distance, because the pad eye, turnbuckle and hook sit in the gap at each corner. Our measurement chart allows about 1.5 to 2 feet at every corner.
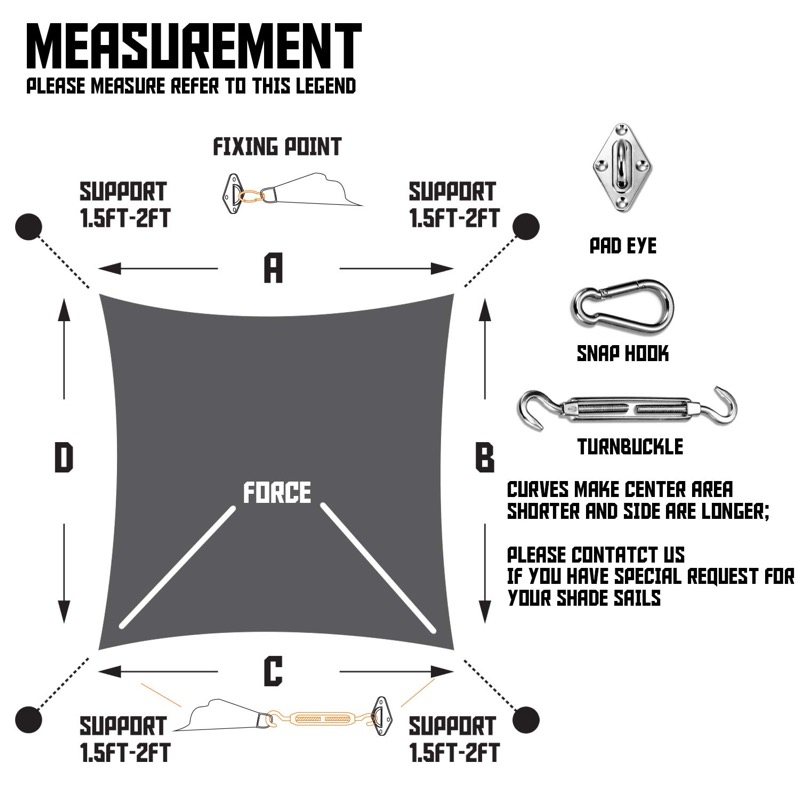
For a triangle, measure all three sides. For four corners, measure all four sides and both diagonals, so you know the anchors really form the shape you think they do.
Fabric stretches, and the sizes in our listings are the finished size when stretched tight. On permeable sails the knitted fabric can also relax a little, so allow a tolerance of a few inches per side. If your anchors are far apart, order a larger sail instead of trying to stretch a small one across the gap. Over-stretching distorts the shape and puts too much load on the stitched corners. If you are between sizes, ask us: sails are cut to order, and you can call 909-696-4567.
Step 3: Mock it up with string
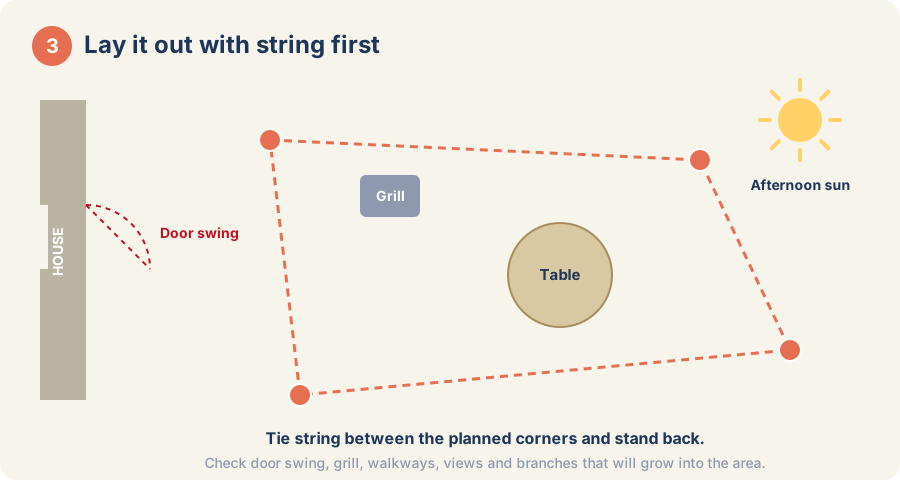
Tie string between the planned corners, higher at the high ones and lower at the low ones, then stand back. In ten minutes you will see whether the sail blocks a door swing, hangs too low over a walkway or leaves a sunny gap where you wanted shade. Moving a string is free; moving a post is not.
Step 4: Pick anchors that can take the pull
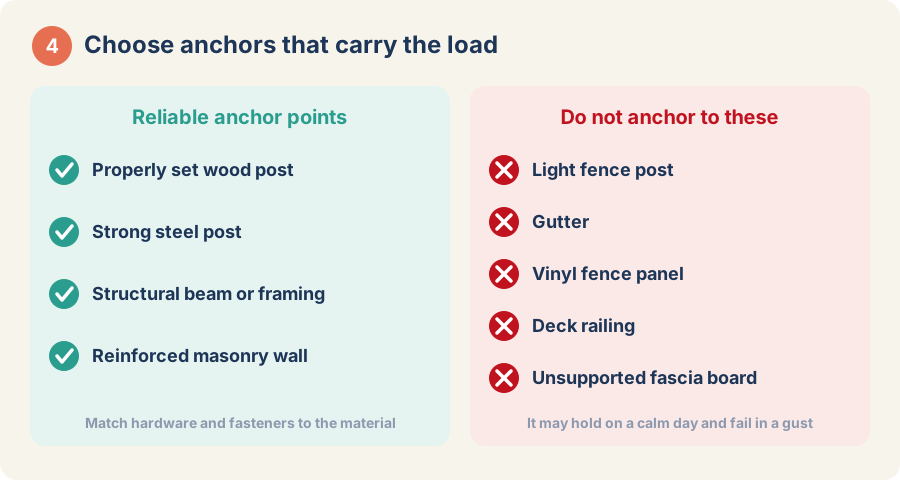
A tensioned sail pulls on every corner all day, and a gust makes that pull much larger for a moment. Good anchors are a properly set wood or steel post, a structural beam, framing behind a wall, or sound masonry. Light fence posts, vinyl fence panels, gutters, deck railings and thin fascia boards are not good anchors, even if they hold on a calm day.
Fixing to the house
Find the framing behind the siding and fix into that. Use corrosion-resistant pad eyes or eye bolts, and use masonry anchors for brick or concrete, drilled into solid material and not into a mortar joint. If you cannot tell what is behind a wall, use a freestanding post instead.
No solid anchor where you need one?
Set a post. A round steel pole can take our 3-inch D-ring clamp, which gives you a ring to attach the hardware to. See all pole accessories.
Step 5: Set the posts
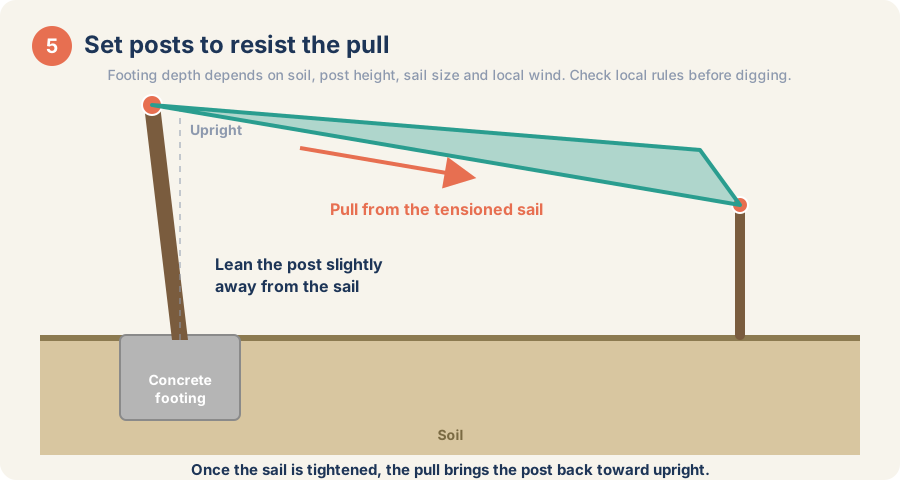
Set posts deep enough for your soil, post height, sail size and local wind. Most permanent installs use concrete footings, and the post is usually tilted a little away from the sail so the pull straightens it. Let the concrete cure for as long as its maker says before the sail goes on, because a footing that is still green moves. Check local building rules for height and property-line setbacks, and call your utility locating service before you dig.
Step 6: Build each corner
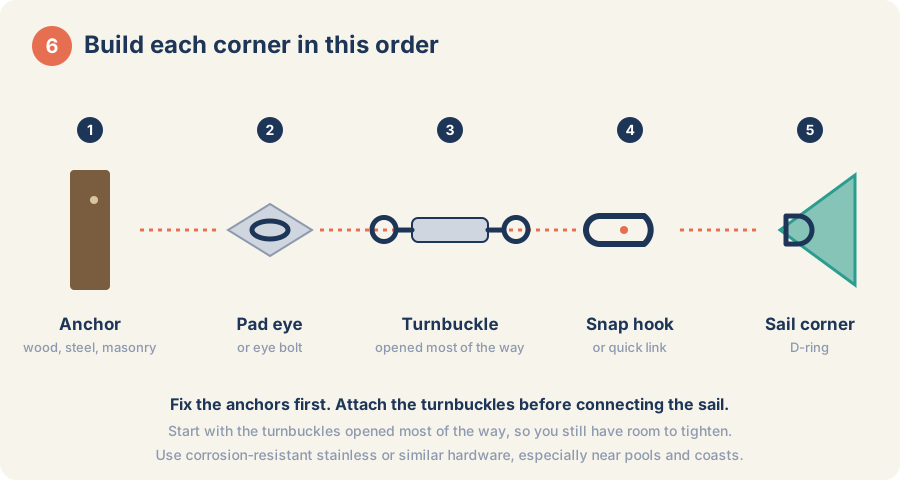
Parts guide: match the drawing to the real thing
The same number always means the same part, in every drawing and photo in this guide: 1 anchor, 2 pad eye, 3 turnbuckle, 4 snap hook, 5 sail corner ring.
| No. | In the drawings | In real life | What it does | Where to get it |
|---|---|---|---|---|
| 1 |  Anchor | 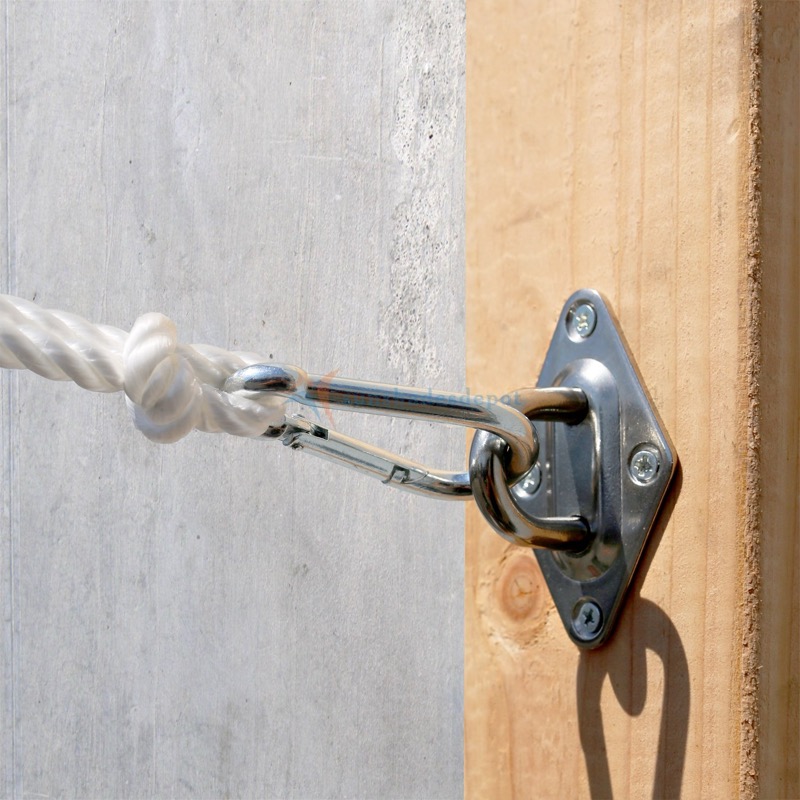 | The solid point everything pulls against: a properly set post, structural framing or sound masonry. | Pole accessories, if you need a freestanding post |
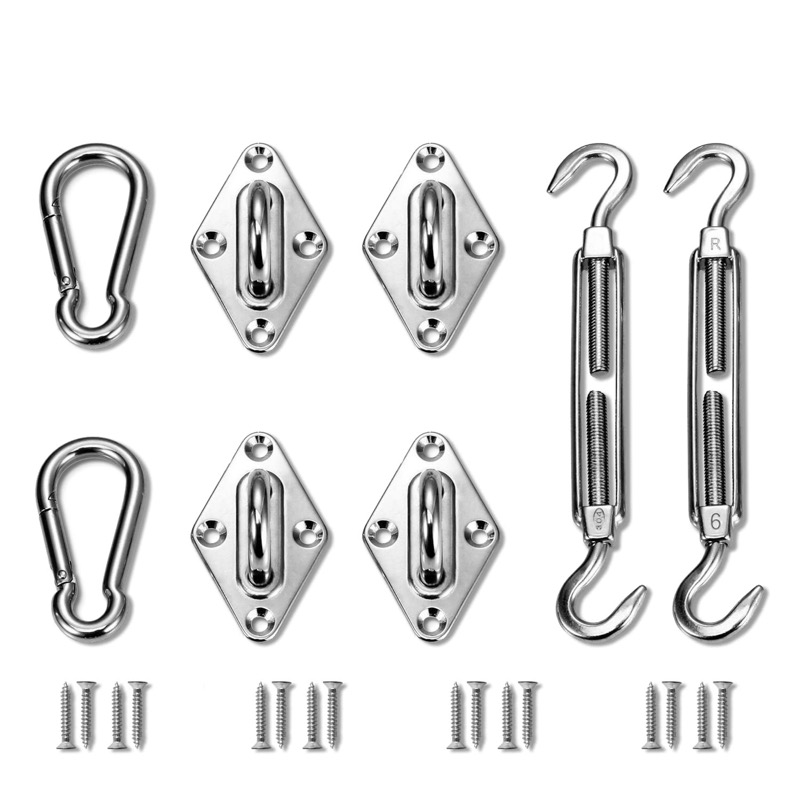
| 2 |  Pad eye | 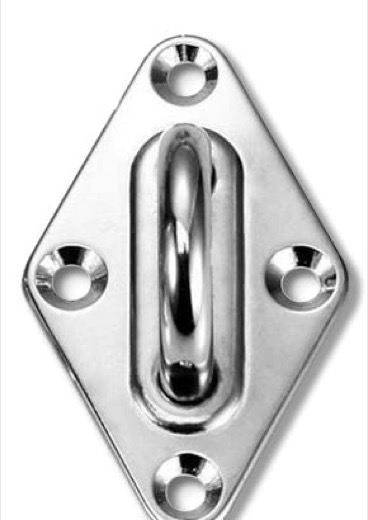 | A flat plate with a ring, screwed into the anchor. The turnbuckle hooks into the ring. | In the hardware kits, with screws |
| 3 | 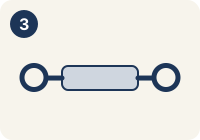 Turnbuckle | 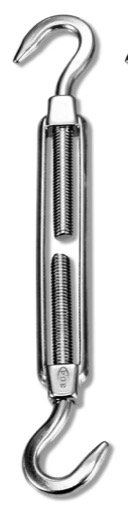 | A threaded body with a hook at each end. Turning it draws the hooks together and tightens the sail. | In the hardware kits (6 in. or 8 in.) |
| 4 | 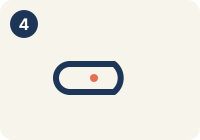 Snap hook | 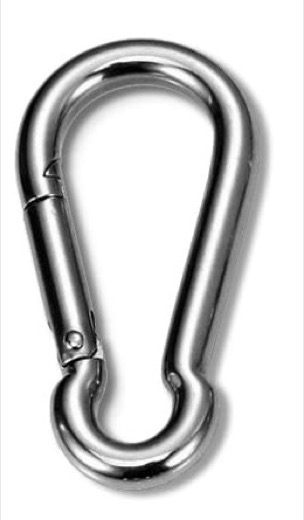 | A spring-loaded hook that closes. It links the turnbuckle to the sail ring and lets you take the sail down quickly. | In the hardware kits |
| 5 |  Sail corner ring | 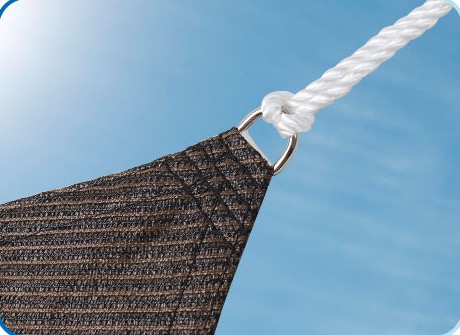 | The ring sewn into each corner. It is the sail's only connection point, so every pull goes through it. | Comes with your shade sail |
 423S
That count matters. The rectangle kit gives you pad eyes for all four corners but a turnbuckle and snap hook for two of them, and the triangle kit has 3 pad eyes, 2 turnbuckles and 1 snap hook. Fit the turnbuckles at the corners you will tension, usually one diagonal pair, and connect the other corners directly to their pad eyes. If you want a turnbuckle at every corner, add a second kit.
124
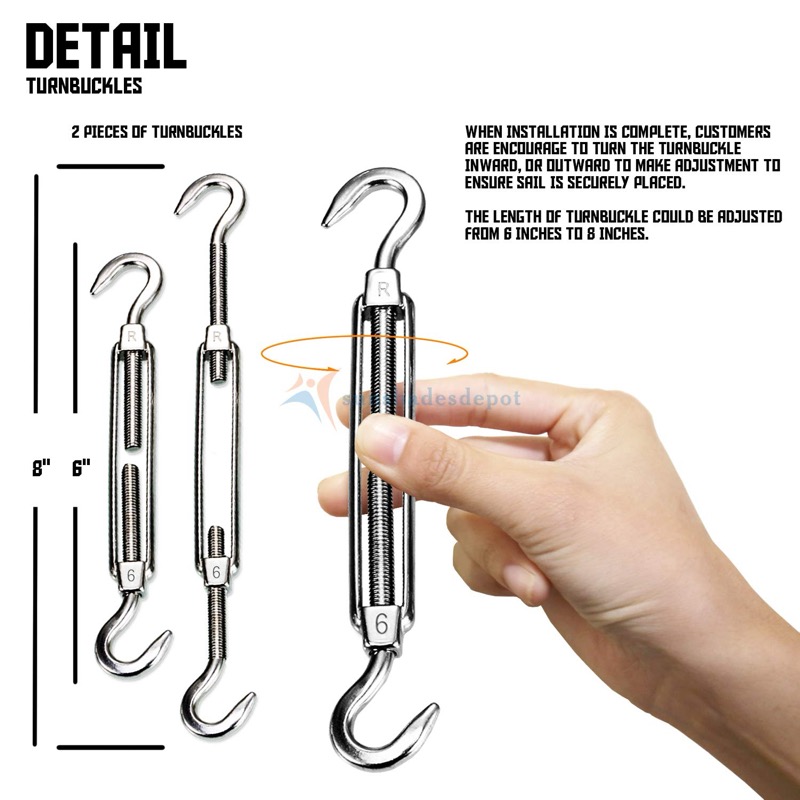
The rest of the kit list is short. You will also need a tape measure, drill and bits, wrench, level, ladder and gloves, plus fasteners suited to your anchor if your wall or post needs something other than the supplied screws.
What Sunshades Depot sells for this step
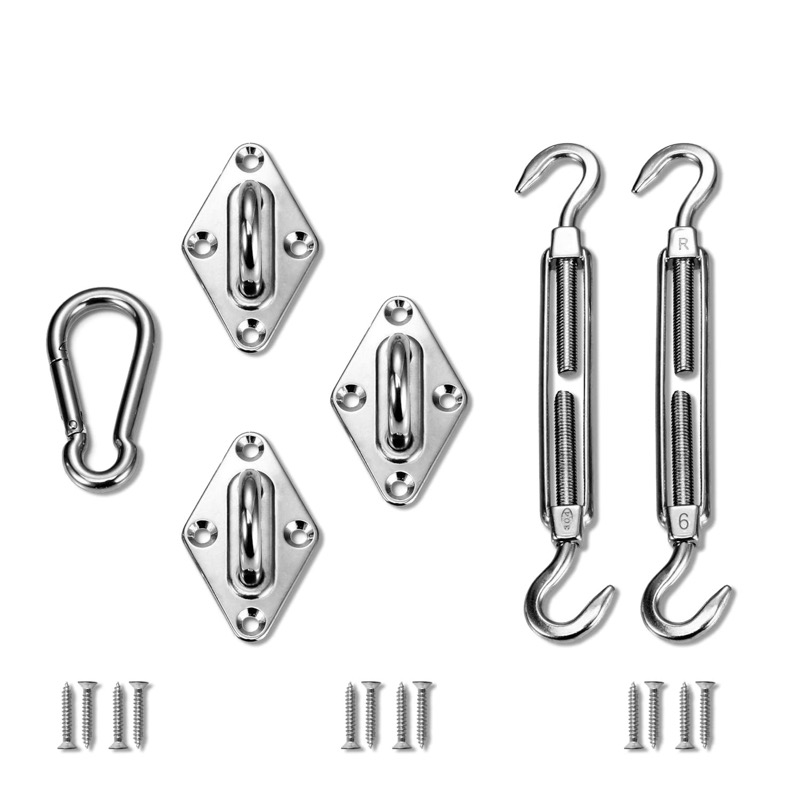
Hardware kits
Pad eyes, turnbuckles, snap hooks and screws in 304 stainless steel. Choose the rectangle kit or the triangle kit, in 6 in. or 8 in. turnbuckles.
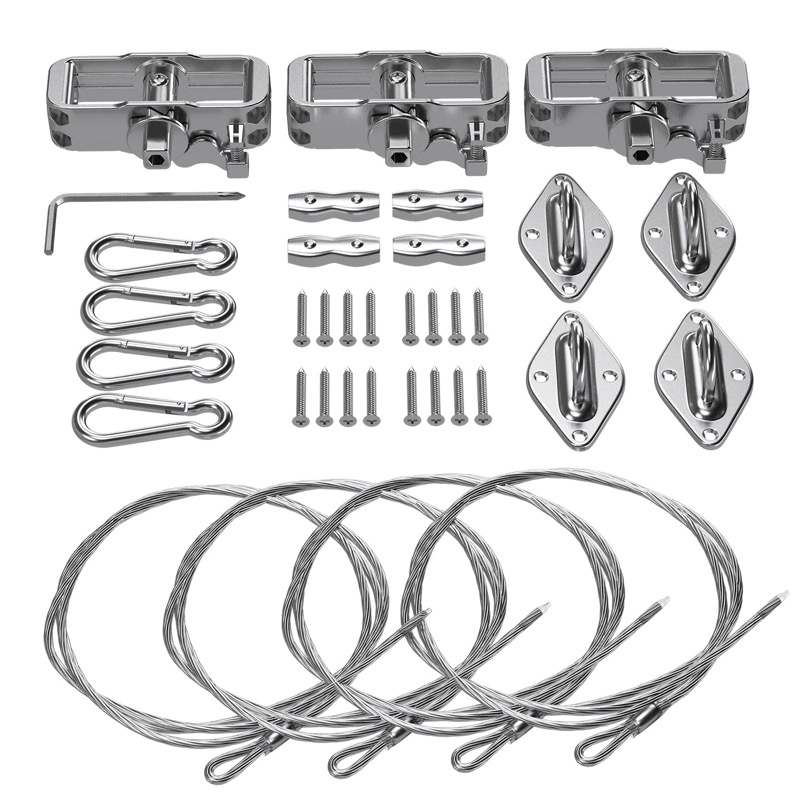
Winch kits
Winches, wire rope, pad eyes, snap hooks and a wrench, if you would rather tension with a winch. For rectangle and triangle sails.
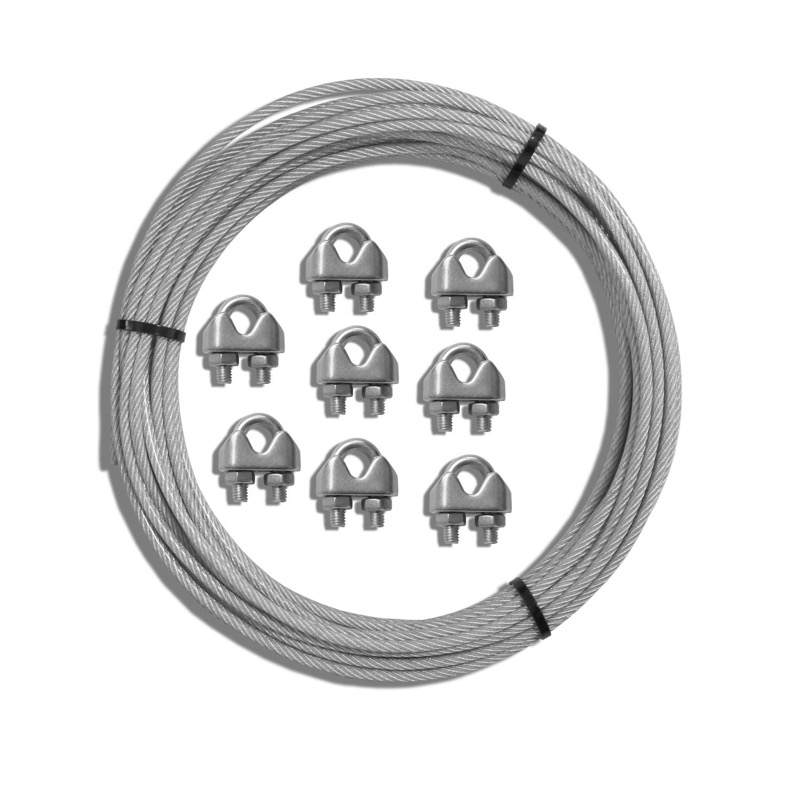
Stainless steel wire rope
3/16-inch stainless steel wire with clamps, cut to the length you need, for an anchor that is farther than the sail corner can reach. See steel rope.
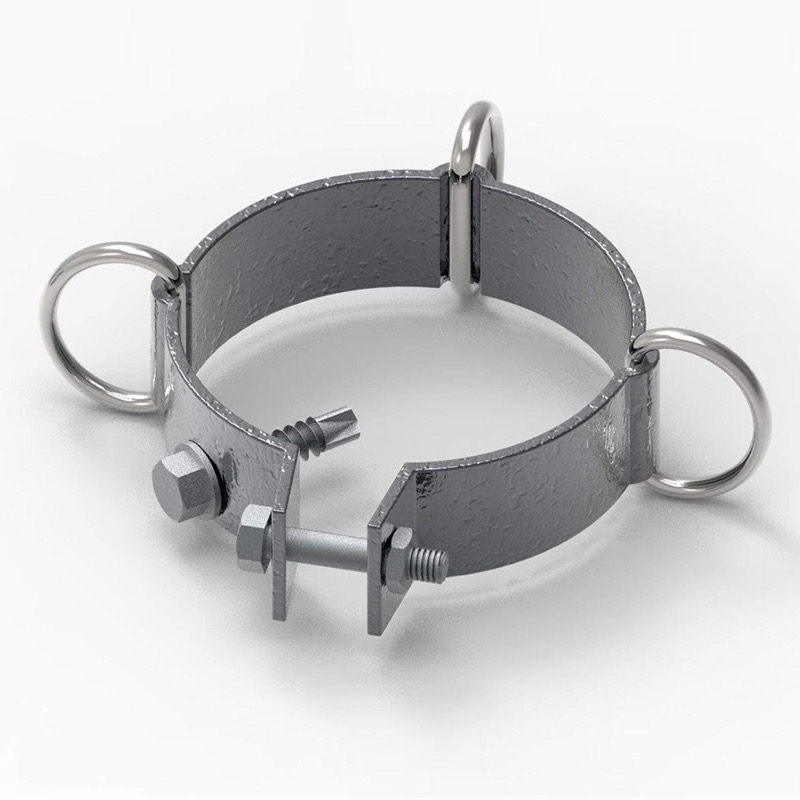
Pole D-ring clamp
Clamps onto a round pole and gives you a ring for the hardware. See the 3-inch D-ring clamp.
| What you need | Where to find it |
|---|---|
| Pad eyes, turnbuckles, snap hooks, screws | Hardware kits |
| Wire rope, clamps and winches | Steel rope, stainless steel wire with tension cable winch |
| Pole clamps and pole accessories | Pole accessories |
| Tape measure, drill, wrench, level, ladder, gloves | Your local hardware store |
A note on cable sails. A cable shade sail has steel cable sewn into each edge and joined to the mounting rings, so the pull runs through the cable instead of the fabric. It is measured from ring to ring, and each ring needs its own connection to an anchor, so plan the hardware for every ring. The hardware is sold separately.
Avoid rope as the permanent connection. Rope stretches, weathers and can rub through. It is fine for a temporary layout; metal hardware gives steadier tension.
Build the corners before the sail goes up
- Fix every pad eye first, at the heights from your string layout. Check that the high and low corners give a clear slope.
- Keep head room for people walking underneath. Do not place the sail where flapping fabric can touch a roof edge, sharp branch, chimney or power line.
- Hook a turnbuckle into each pad eye that will be tensioned, and open it most of the way. A turnbuckle that starts nearly closed has no travel left when you need it.
- If the anchor is farther away than the corner can reach, add wire rope with clamps between the pad eye and the turnbuckle, so the turnbuckle can still work.
Step 7: Hang the sail and tighten it
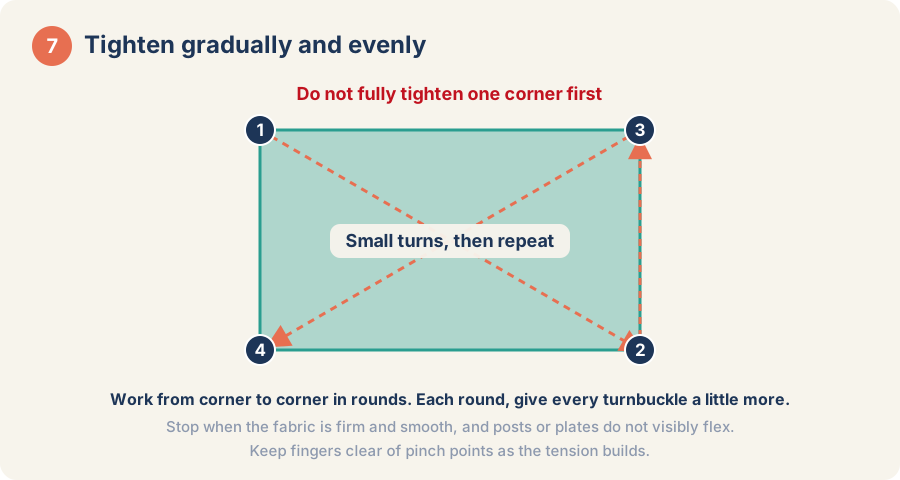
Hang the sail one corner at a time, starting with the highest or hardest to reach, then the opposite corner. Clip each sail ring to its hardware with the snap hook and make sure the hook is fully closed. Keep your fingers away from pinch points as the tension rises.
Once every corner is connected, tighten the turnbuckles a little at a time, moving around the sail. The sail should end up firm and smooth with a visible twist, but not so tight that a post, wall plate or pad eye visibly flexes. A little curl along the edge is normal.
Step 8: Check where the water goes
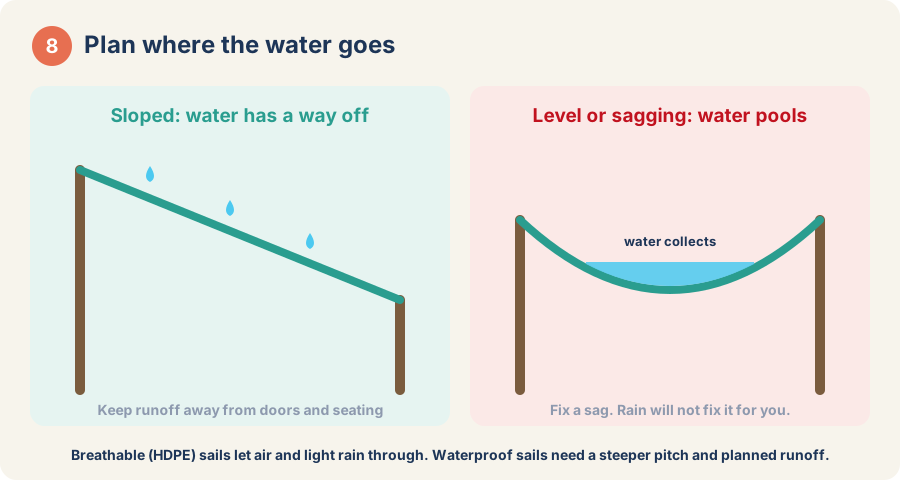
Look at the lowest point. Water should have a clear way off the sail and away from doors, seating and a neighbor's yard. If a low pocket forms near the middle, change the corner heights or the tension. Do not leave a sag and hope.
A permeable sail lets air and light rain through, so it is more forgiving. A waterproof sail cannot drain through the fabric: our waterproof listings call for a steep pitch of roughly 20 to 40 degrees, fully tensioned, with the waterproof strip on the underside, and they are meant for light rain. Avoid using one in heavy rain or a snowstorm.
Step 9: Re-check after the first week
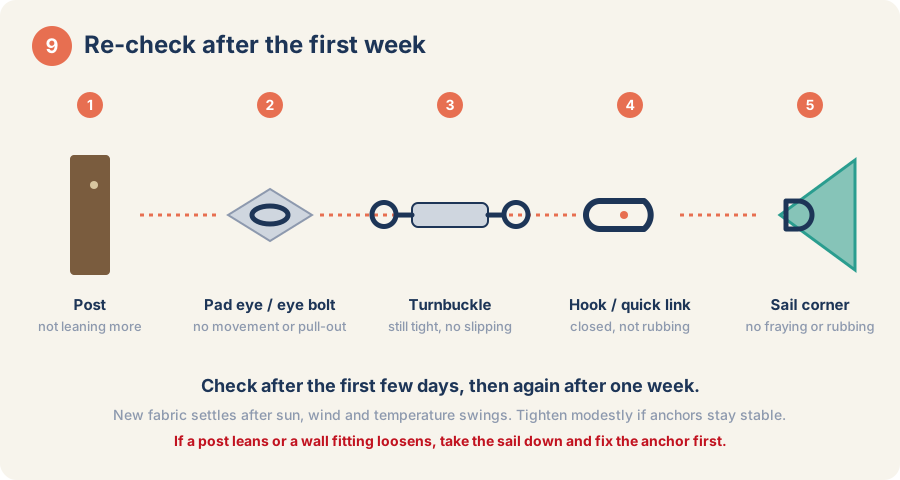
Use the same numbers as in step 6:
| No. | Part | What to look for |
|---|---|---|
| 1 | Post / anchor | No more lean than when you installed it. Footing not cracked or lifting. |
| 2 | Pad eye | Not moving or pulling out. Screws tight. The wood or wall around it still sound. |
| 3 | Turnbuckle | Still tight and has not unwound. Re-tighten a little if the other points are stable. |
| 4 | Snap hook | Closed and latched. Not rubbing through the ring. |
| 5 | Sail corner ring | Fabric and stitching around the ring are intact, with no fraying or chafing. |
New installs often need a second adjustment once the fabric has been through sun, wind and a few temperature swings. Check after the first few days and again after a week. A sail that is correctly tensioned does not slap loudly in a normal breeze, and flapping wears both the fabric and the hardware. If a post leans or a wall fitting loosens, take the sail down and fix the anchor before you use it again.
Seasonal care
If your sail and installation are not built for high wind or heavy snow, take it down ahead of those events. Snap hooks make that a two-minute job. Store the sail clean and dry. Do not hang lights, swings or planters from a sail unless the whole system was designed for that extra load.
Common mistakes
- Anchoring to a fence, gutter or railing. None of them is built for a sail's pull (step 4).
- Hanging the sail level. A level sail sags and holds water (steps 1 and 8).
- Ordering the size of the space. Take off the hardware gap first (step 2).
- Tightening one corner fully first. That distorts the sail and overloads one anchor (step 7).
- Using rope as the permanent connection. It stretches and wears (step 6).
- Skipping the one-week check. Fabric and fittings settle in the first days (step 9).
Frequently asked questions
How tight should a shade sail be?
Firm and smooth, with a visible twist and no sagging pocket. It should not be so tight that a post, wall plate or pad eye visibly flexes.
Can I attach a shade sail to a fence?
Treat light fence posts and vinyl fence panels as unsuitable. The sail pulls constantly, and wind adds sudden extra load. Use a properly set post or a structural fixing instead.
How high should the corners be?
High enough to walk under comfortably and to clear nearby objects, with at least one corner higher or lower than the rest so the sail twists and sheds water. Waterproof sails need a steeper pitch than permeable ones.
What size sail should I order?
Measure from anchor to anchor and subtract about 1.5 to 2 feet at each corner for the hardware. Our sails are cut to order, so you can tell us the exact size you need.
Do I need a permit?
Rules vary by town. Large or permanent structures and posts near a property line may be regulated, so check before you dig or build.
Can I leave the sail up all year?
That depends on the product and your climate. If the sail and installation are not built for high wind or heavy snow, take it down ahead of those events.
A careful layout and sound hardware take longer than tying a sail to the nearest post, and they are what make the shade dependable. Once the anchors are right, a quick check now and then is all the sail needs.
Shop shade sails and hardware
- Permeable shade sails - breathable and cooler underneath
- Waterproof shade sails - rain protection, installed at a steeper pitch
- Cable shade sails
- Shade sail hardware kits
- All accessories
- Read next: Shade Sail Hardware Guide and Shade Sails in High Winds