
Shade Sail Hardware Guide: What Each Part Does and Which Kit to Buy
You can buy a good shade sail and still end up with a droopy one if the hardware is wrong. The sail only gets its shape from what holds it: the anchors, the fittings and something to adjust the tension with. This guide explains what each piece does, which kit fits which sail, and what to check so the hardware does not become the weak link.
 423S
This guide is about choosing hardware. For installing it step by step, see How to Install a Shade Sail. If your site is windy, also read Shade Sails in High Winds.
1. What each part does
A shade sail only works if it is under tension. The fabric needs a firm pull in several directions to shed water, resist flapping and keep its curve. The hardware carries that pull from the reinforced rings in the sail to a wall, post or other anchor.
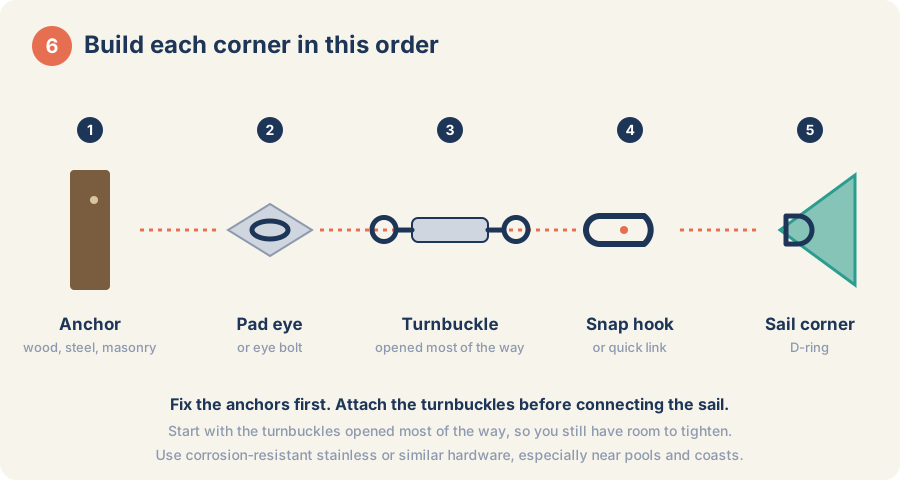
Parts guide: match the drawing to the real thing
The same number always means the same part: 1 anchor, 2 pad eye, 3 turnbuckle, 4 snap hook, 5 sail corner ring. Two more parts appear in this guide: 6 wire rope with clamps and 7 tension winch.
| No. | In the drawings | In real life | What it does and what to check | Where to get it |
|---|---|---|---|---|
| 1 |  Anchor | 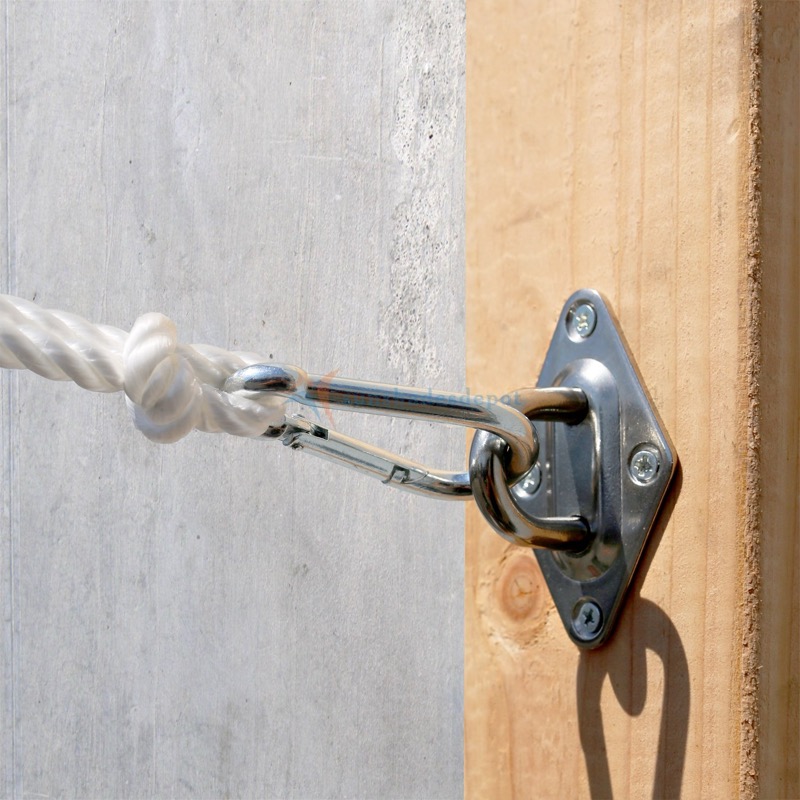 | The solid point everything pulls against: a properly set post, a beam, structural framing or sound masonry. Not siding, trim, fence panels, thin fascia, gutters or trees. | Pole accessories, if you need a freestanding post |
| 2 | 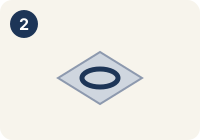 Pad eye | 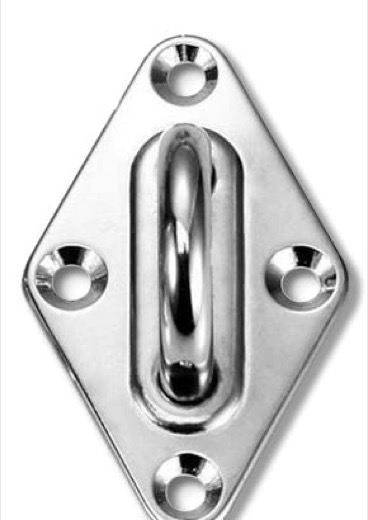 | A flat plate with a ring, fastened to the anchor. Use fasteners that suit the surface: masonry needs masonry anchors, and every screw must go into solid material. | In the hardware kits |
| 3 | 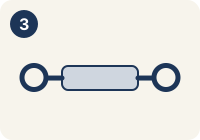 Turnbuckle | 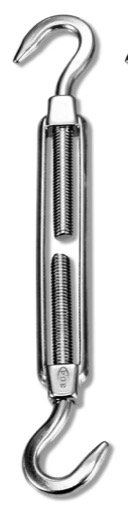 | A threaded body that draws its two hooks together as you turn it. Fit it mostly open, so you keep adjustment range for later. | In the hardware kits (6 in. or 8 in.) |
| 4 |  Snap hook | 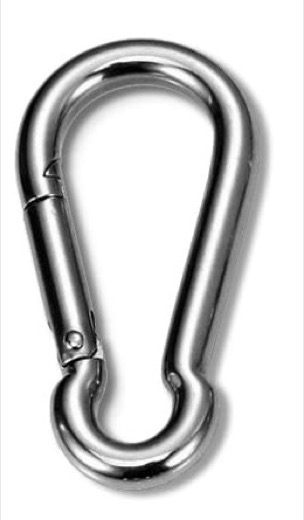 | A spring-loaded hook that links the turnbuckle to the sail ring. Make sure it is fully closed. It also lets you take the sail down quickly. | In the hardware kits |
| 5 |  Sail corner ring | 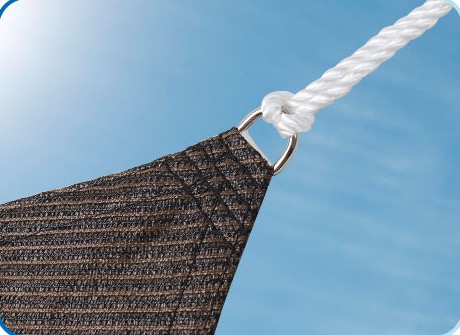 | The reinforced ring sewn into each corner. Every pull goes through it, so keep hardware off sharp edges that could rub the corner webbing. | Comes with your shade sail |
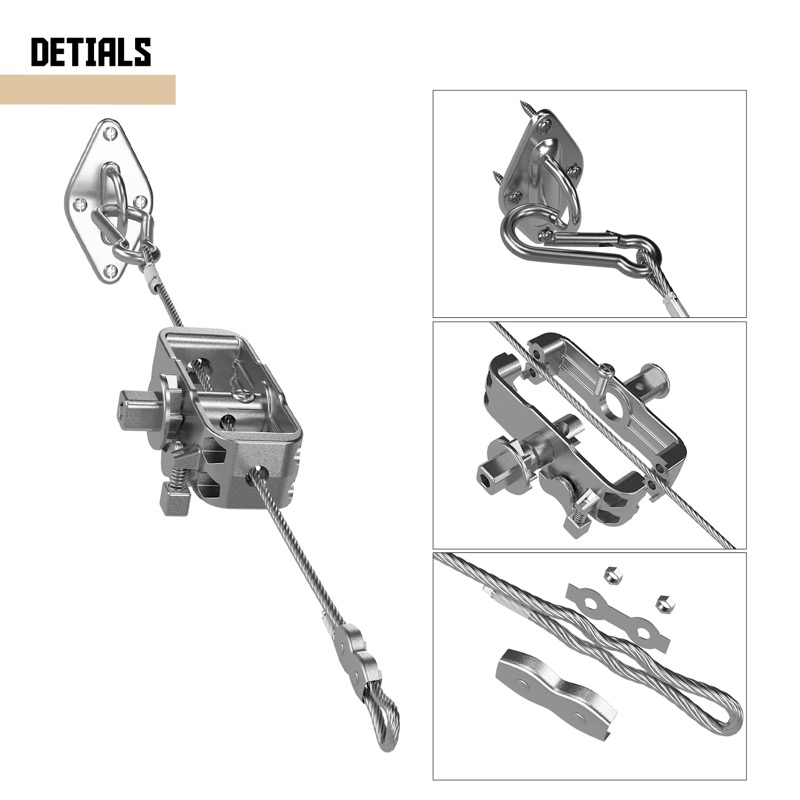
| 6 |  Wire rope and clamps | 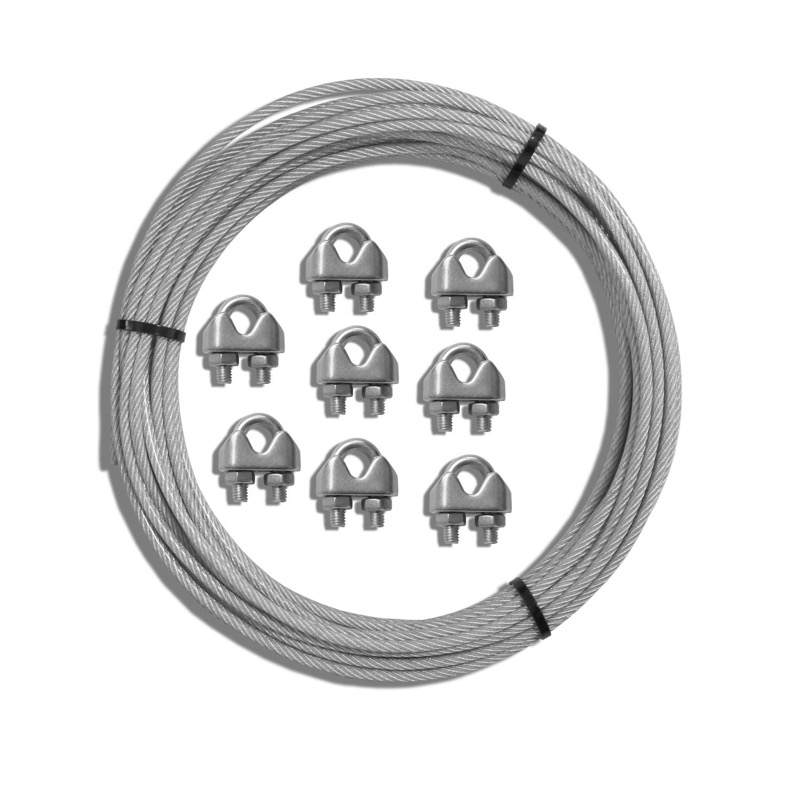 | Bridges a longer distance when the anchor is farther away than the sail corner can reach. 3/16-inch stainless steel wire, sold with clamps. | Steel rope |
| 7 |  Tension winch | 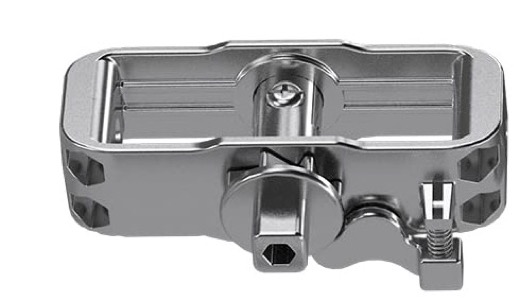 | An alternative to the turnbuckle. You feed the wire rope through it and tighten with a wrench. | Winch kits |
Not every setup needs every part. A short connection can use just a pad eye, turnbuckle and snap hook. A larger patio may need wire rope at one or more corners to reach the anchors.
2. Match the hardware to the surface
Strong hardware cannot rescue a weak surface. Before you choose parts, decide where each corner will attach and whether that spot can take a steady outward pull.
Walls, beams and framing
For a house-mounted sail, fix pad eyes into solid framing, masonry or another properly built structural surface. Siding, trim, fence panels and thin fascia are not dependable by themselves. If you cannot confirm what is behind the surface, choose another spot or ask a qualified installer.
Freestanding posts
Posts must be sized and set for the sail and your local wind. A light fence post may be fine for a privacy screen, but it is generally not a suitable anchor for a tensioned sail, because a post that flexes lets the hardware loosen. See the post-setting step, and our 3-inch D-ring clamp for round poles.
Trees
Trees are a poor default anchor. They move in the wind and keep growing, and a tensioned sail can damage both the tree and the fabric. A fixed anchor is easier to inspect and more predictable.
3. Pick the connection that fits your gap
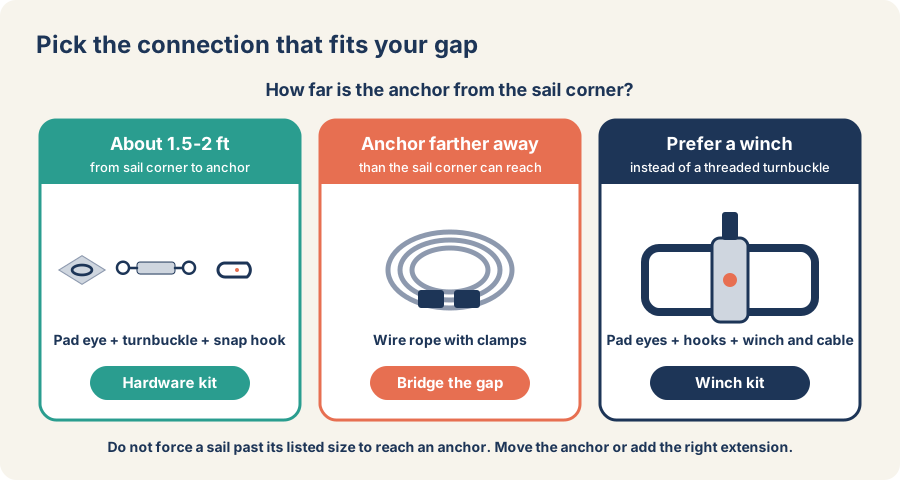
Do not measure ring to ring and order a sail that fills the space exactly. Leave about 1.5 to 2 feet between each sail corner and its anchor for the hardware, depending on the turnbuckle size and the sail shape. The measuring step has a worked example.
A turnbuckle matters because fabric relaxes a little after the first tensioning, and the turnbuckle lets you correct that without taking anything apart. Fit it with plenty of travel left, so you can still tighten later. Put them on at least two corners.
A well-tensioned sail is firm, with no loose middle and no loud flapping. At the same time, do not stretch a sail beyond its size just to reach an anchor. Moving the anchor, or adding a proper extension, is safer than over-tensioning the fabric. If you would rather tension with a winch than turn a turnbuckle, choose a winch kit. If the anchor is farther than the sail can reach, add wire rope with clamps.
4. Materials and corrosion
Stainless steel is a common choice for shade sail hardware because it handles outdoor moisture well. Our rectangle and triangle hardware kits are 304 stainless steel, and the wire rope sold by the foot is 3/16-inch stainless steel with clamps.
Coastal homes and pool areas expose hardware to more salt and chlorine, so inspect it more often there and rinse it now and then. Avoid mixing different metals where you can, especially in damp or salty places, because corrosion tends to start where unlike metals touch.
5. Which Sunshades Depot kit to choose
| Your situation | What to look at |
|---|---|
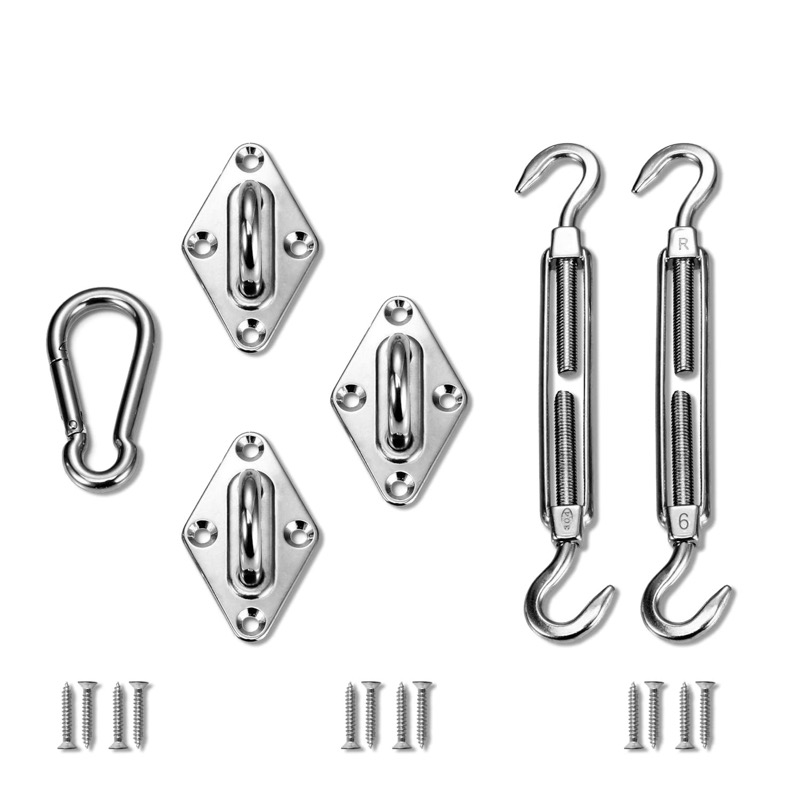
| Square or rectangle sail | Rectangle kit with 6 in. turnbuckles or 8 in. turnbuckles. Contains 4 pad eyes, 2 turnbuckles, 2 snap hooks, 16 screws. |
| Triangle sail | Triangle kit with 6 in. turnbuckles or 8 in. turnbuckles. Contains 3 pad eyes, 2 turnbuckles, 1 snap hook, 12 screws. |
| Anchor farther than the sail corner reaches | Stainless steel wire rope with clamps, in the length you need |
| You prefer a winch to a turnbuckle | Winch kits for rectangle (3 winches, 4 pad eyes, 4 snap hooks, 4 x 6 ft cable, wrench) and triangle (2 winches, 3 pad eyes, 3 snap hooks, 3 x 6 ft cable, wrench) sails |
| No solid anchor where you need one | Pole accessories, including the 3-inch D-ring clamp |
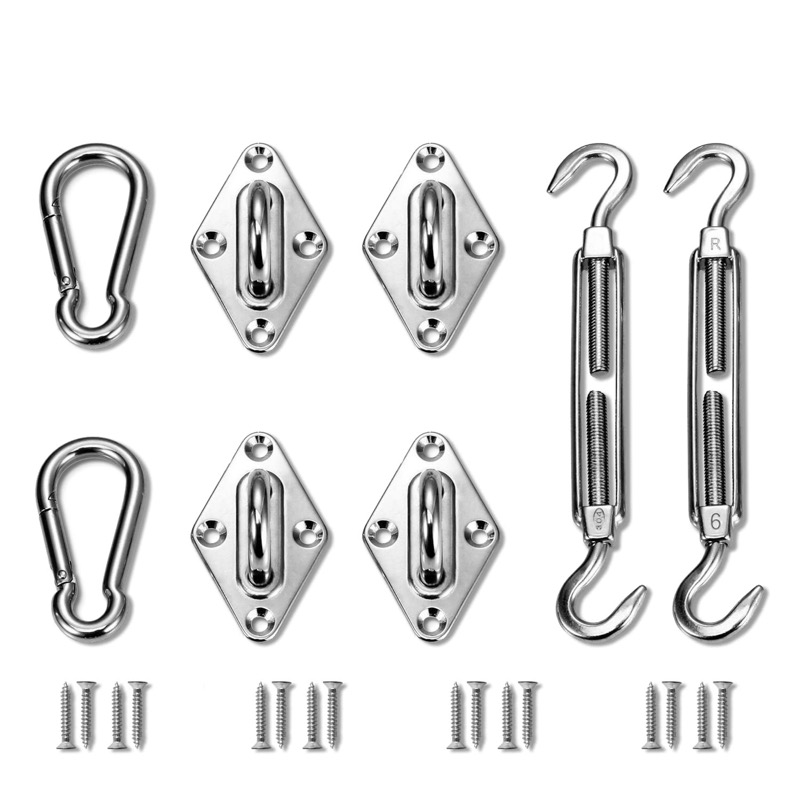
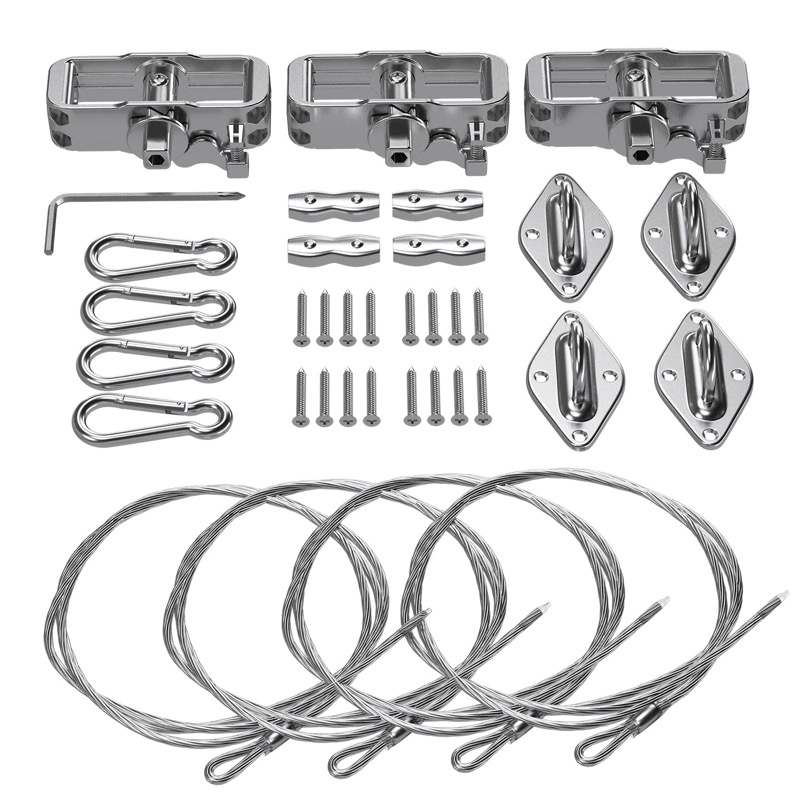
The kit counts matter. A standard kit has pad eyes for every corner but a turnbuckle and snap hook for two of them (one in the triangle kit), so it tensions one diagonal pair and fixes the rest. If you want a turnbuckle at every corner, add a second kit. A longer turnbuckle generally gives you more adjustment range, so check the dimensions on the product page before you order.
Cable shade sails are sold without hardware. Each mounting ring needs its own cable or fitting to an anchor, so count the rings and plan a connection for each. You can use wire rope with clamps, or the winch kits above.
6. Checks before and after you tension
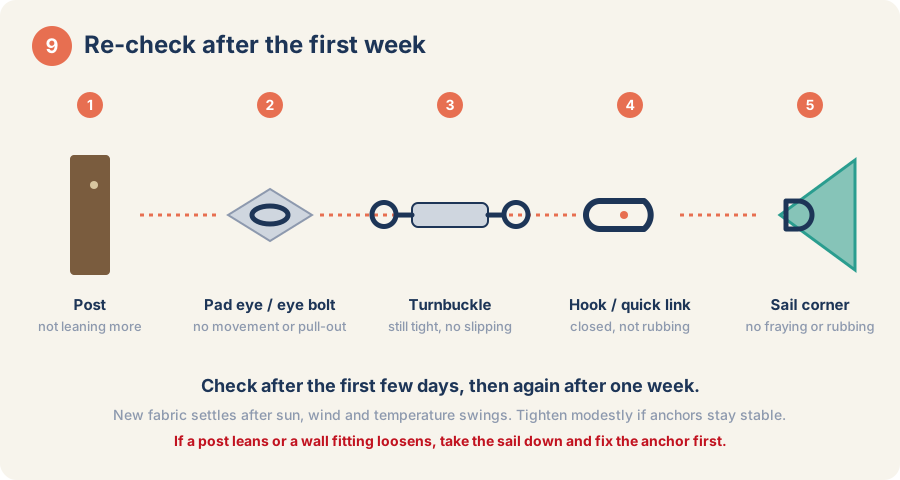
Before the final tensioning, go over every connection:
- Snap hooks are fully closed.
- Turnbuckle threads are engaged evenly, with adjustment range still left.
- Fasteners suit the surface they go into.
- Nothing rubs the corner webbing, and no hardware sits against a sharp edge.
Set at least one corner lower than the others so rain has a way off. A flat sail collects water in the middle, which adds a lot of weight to both fabric and hardware. Think about where the runoff will land, and keep it away from doors and a neighbor's yard (see the drainage step).
Check the tension again after the first few days, since temperature changes, fabric settling and early wind can reveal a loose connection. Keep inspecting now and then, and after storms. If severe weather is forecast, taking the sail down protects the fabric, the anchors and what is around them (see when to take it down).
Frequently asked questions
Do I need chain to extend the connection?
No. For a longer reach, use stainless steel wire rope with clamps, or move the anchor closer.
Can I tie the sail with rope instead of hardware?
Use rope only for a temporary layout. It stretches and wears. Use metal hardware for the permanent connection.
Turnbuckle or winch?
Both tighten the sail. A turnbuckle is a threaded body that you turn by hand, and a winch kit tightens wire rope with a wrench. Pick the one you find easier to adjust, and keep some adjustment range in reserve.
Can I use stainless steel hardware near a pool or the coast?
Stainless steel is a common choice outdoors, but salt and chlorine are hard on any metal. Inspect it and rinse it more often in those places.
Can I attach a shade sail to a tree?
It is better not to. Trees move and grow, and a tensioned sail can damage the tree and the fabric. Use a fixed anchor.
How many kits do I need?
One kit per sail covers the pad eyes for every corner and the turnbuckles for two corners. For a turnbuckle at every corner of a rectangle, order a second kit.
Good hardware should make a sail easier to look after, not harder to trust. Start with sound anchors, leave room to adjust, and check the connections before the weather does.